How I fell down the upcycling rabbit hole
2025-08-09
It all started with this Scientific American article. After reading the section on the shape known as the "hyperbolic pair of pants" in early June, I decided I needed the shape on an actual pair of pants. I went to YSM Double Take and got an incredibly well-fitting pair of jeans for $5-- I kind of felt bad about what I was about to do to them, but I figured if I screwed up the shape, I could always try to turn it into a different design. My next purchase was a haul from the three-storey Michaels near Osgoode station: a pack of fabric paints, cheap brushes (apparently fabric paint destroys brushes, so buy cheap), and a few embroidery supplies if I decided to go that route. Honestly, I'm not a big fan of embroidery-- my hands get sweaty, slip off the needle, and then I end up stabbing myself in the finger or losing a needle in the couch. So plan A was painting.
I followed these tutorials and successfully managed to avoid any disastrous mistakes. I started by cutting the hyperbolic pair of pants shape directly out of the magazine, then chalking a few shapes onto the pants, and finally painting inside the chalk. Pretty straightforward and I think it turned out great.
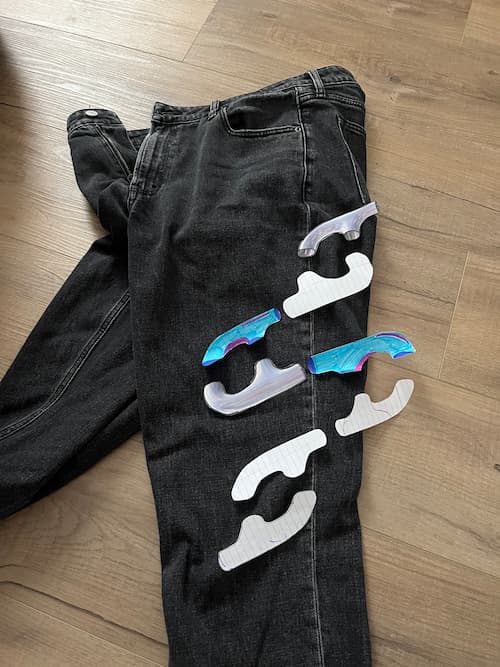
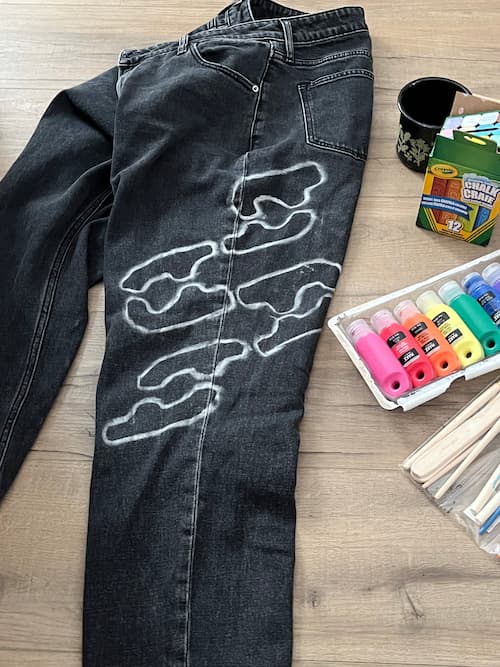
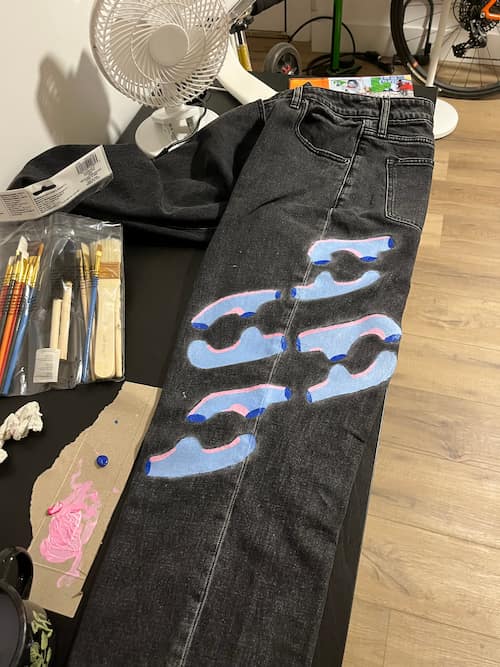
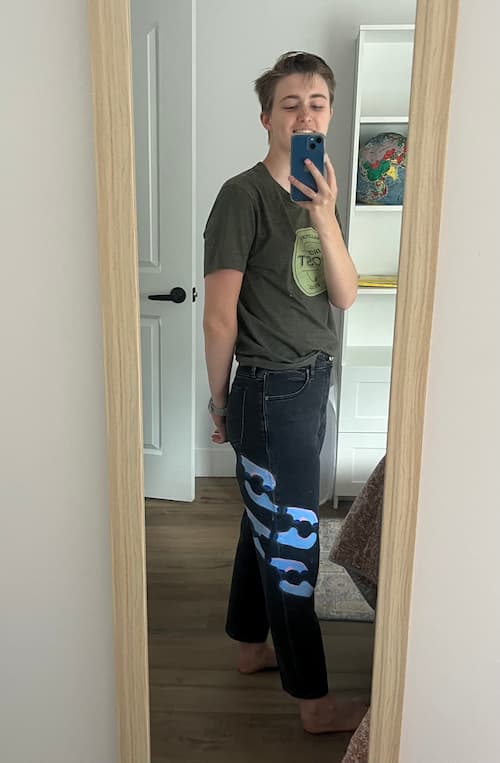
The whole process.
It turned out painting pants was kind of fun, and naturally, I had other pants. At this point my hubris led me to think a bit bigger, so after poking around on Pinterest, I found a couple of reference photos and began developing a vision for my next project: the optical illusion pants. I wanted to recreate this on the knee of one of my favourite pairs of jeans. What could go wrong?
It turns out you can paint over your mistakes if you wait for the paint to dry long enough, which sounds like a life lesson applicable to more than painting pants but probably isn't. I started out very cautious, using a ruler to precisely measure pencil lines and everything, and then for some reason I threw caution to the wind once I brought out the paint. After adding black paint to what was going to be a white square, I decided to focus on painting the actual black squares inside the lines and then do everything else a couple days later once my mistakes had dried. But by that point I was kind of excited, and ended up doing all of the colourful parts as well. I debated whether I wanted to do the white at all-- it looked fine as is, and I was worried about screwing up my work so far. I eventually did decide to add the white, and it was very much worth it for the illusion.
By this point I had realized the power of upcycling to actually make you excited about your old clothes, and I decided to test this power on an old pair of pants that, unlike the first two, I didn't particularly like. They were way too small around the waist and hips, a little too short, and an ugly drab olive colour. And to this pair of pants I decided to add an octopus. Why an octopus? Because it was apparently a trend on Pinterest, so I had plenty of reference photos. I didn't trust myself to make up my own designs.
The octopus was actually easier than the first two designs because there weren't really any lines to draw inside-- I could just make a thicker octopus. Even when I made mistakes drawing the face, I could just paint over it in red and it looked fine. I'm not sure if I just had more practice by this point or if octopuses are generally easier than squares, but either way, I highly recommend this as a starter project.
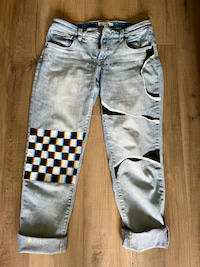
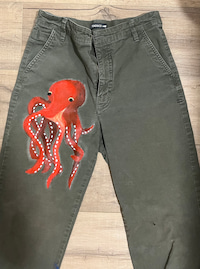
The next two pairs of pants. The optical illusion actually does work if you look at the pants from a distance, I promise.
This is when I really started to go off the deep end. I blame the Pinterest algorithm. One night as I was falling asleep, a little voice in my head said "hey, what if you could alter the octopus pants so they fit?"
I do actually have some sewing experience. My mom can sew almost anything, and we used to do projects together a lot when I was little. But I haven't used a sewing machine in years, at least not since I moved to Toronto, and I certainly don't have room in my apartment for all the required supplies. I still wanted to try, though. My next shopping trip was to the Bloor-Yonge Fabricland, where I got the closest fabric I could find to the octopus pants-- but in a light green colour as a fun accent. I also wandered around trying to think what else I could need-- I already had a seamripper, pins, and thread, but I got extra bobbins, fusible interfacing, and fabric scissors. Finally, I took the thankfully-up-and-running Spadina streetcar to the Toronto Tool Library, where I acquired a subscription and rented their sewing machine.
It turns out attacking clothes with a seamripper is incredibly therapeutic. I highly recommend it if you ever get the chance. All I had to do for the octopus pants was split the side seams (?) and undo the hem at the bottom, then attach strips of the new fabric. The hardest part was trying to figure out how big I should make the expanded side seams. I ended up using strands of yarn as makeshift suspenders and pinning the new fabric in place while wearing the deconstructed pants. This is unfortunately a great way to stab yourself in the thigh. But it was all worth it in the end!
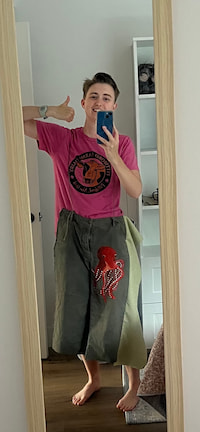
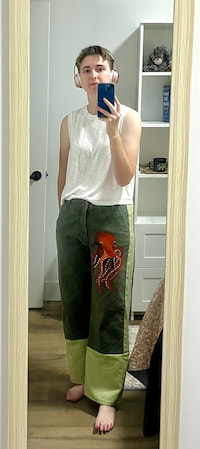
The updated octopus pants that now fit me and look cooler. Beware of the upcycling pipeline.
My next victim was a wrap skirt I had mainly bought because I loved the fabric. I'd been trying to sell it off to a consignment store since I made the mistake of wearing it out once in the full Toronto wind. Since it was a wrap skirt, it was sort of open at the front, and the wind blew it completely open while I was waiting to cross the Yonge and King intersection, and I'll have to live with that for the rest of my life. Also, skirts aren't really my thing. I got it in my head that I could use the fabric to make a shirt, and before I had made any sort of plan or found a pattern, I got out the seamripper. It was definitely more of a challenge than the pants, but soon I had a few usable pieces of fabric.
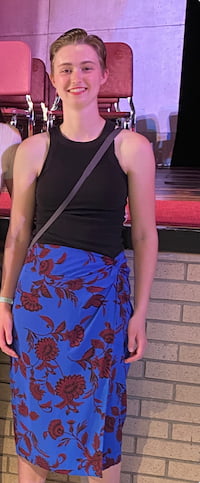
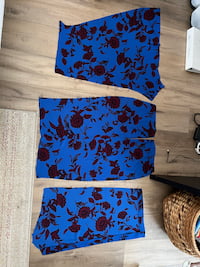
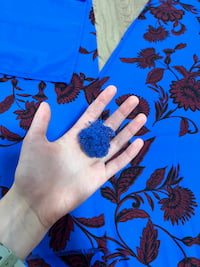
The original skirt, the seamripped skirt fabric, and all the thread I pulled out.
I found a pattern on Etsy and spent a very strange evening printing out lifesize pattern pieces and jigsaw-puzzle-ing them together only to cut them right back out. I then had to make another trip to Fabricland midway through cutting the fabric because I didn't have nearly enough from the skirt. I thought about adding a totally different colour, but ended up going for the closest blue I could find. Honestly, I stopped seeing the difference after a few days sewing with both fabrics.
Sewing a shirt is really freaking hard. This summer, I deployed a Python package and sewed a shirt, and the former was much easier. To start with, the fabric was a nightmare to work with. I don't feel good about cursing on this blog because I know it's reachable from my LinkedIn, but know in your heart that I am cursing inside when thinking about this fabric. It wouldn't lay flat after being ironed, it kept catching and scrunching up under the sewing machine needle, and it frayed at the speed of light. Maybe some of this was my fault for not being experienced enough, but oh well, I'll never know. Anyway, the pattern was pretty straightforward at first, and I was able to breeze through up until the shoulder seams. The shoulder seams were actual hell. I think I redid them three times each, and even after I had done my absolute best, there were still a few puckers. Luckily, the fabric is kind of an attention-grabber and I don't think people will notice right away.
Next was the collar, which was intricate but I knocked it out in an afternoon. Remember how I said I didn't have the space for sewing supplies? Between the sewing machine set up at my desk, the ironing board and iron blocking my front door, and pieces of fabric on every available surface, I had basically locked myself into shirt purgatory, so I was trying to power through and get all the machine sewing done as fast as possible. I moved on to the front button interfacing, the instructions for which were so confusing that it took me three days to figure out what the pattern wanted me to do. I found a YouTube video for the pattern, at which point I figured out I'd done the collar wrong and had to redo all of that, made it back to the interfacing step, fused the interfacing to the iron by accident, promptly ran out of interfacing, and spent the rest of the August long weekend desperately contorting the shirt to match up with the video. After having to take a break to focus on real work, I finally managed to finish the button panels, and after that it was just hemming and I was done.
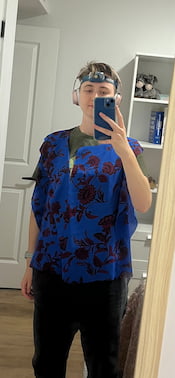
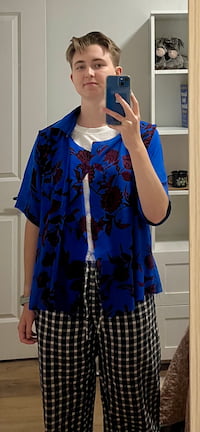
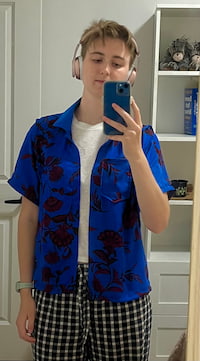
The process of sewing the shirt, from "loose vest" to "actual shirt".
With one day to go before my sewing machine was due back on Spadina (they only give you a week), I decided to lengthen some pants pockets using this tutorial. Now, sewing-machine-less, I'm in a sort of withdrawal, but I'm technically not done with the shirt-- I still have to add buttons and maybe embroider around some of the seams. I guess the Michael's embroidery floss will come in handy after all. And maybe it isn't such a bad thing if I get a needle stuck in the couch. In fact, I found a pin in the couch while writing this. Who knows where I'll get stabbed next?